Showing posts with label diy. Show all posts

Thursday, 26 September 2013

diy | desk to nightstand


We are in the middle of re-decorating our master bedroom. After painting and wallpapering (post to come), now it's time to put all the furniture together. I didn't want to spend a small fortune on something from a big box store - it's not something I 'pictured' for this room. I needed to find the perfect nightstand. 

We got rid of our old night stands, which are less than a year old but they just weren't working for me. I wanted to find that perfect piece, the one that just completes the look, makes everything whole. So began my search for the perfect night tables. My search went on, and on, and on. 

Weeks later, and not to mention an annoyed husband that didn't have a nightstand, after I had searched every store, looked online, looked at garage sales - nothing. Couldn't find a nightstand. And then it hit me. I have to think outside of the box. While I was fully prepared to refinish something if I needed to I thought If I'm refinishing it anyway why does it have to be a nightstand already? Why can't I make something into a nightstand? Why can't it be a small dresser, or desk, or shelf?

Game changer, right there. I immediately went online and searched for a second hand item on a local buy/sell/trade website. Bang, I found a desk. Solid wood = sturdy and well made. Some dents and scrapes = putty&sand. Knotty pine = paint it. I was pumped. I immediatly thought, there is only a piece of wood on the top marrying the two sides together. Why not cut it to separate the sides. There - matching night stands. While my husband wasn't as excited as I was I knew he had faith in me as he offered to help. Well, more like I voluntold him. :D

We picked it up for cheap. Brought it home (in the rain! good thing it's made of real wood) measured and cut the sides equal. We took some orbital sanders to it to scuff the polish off. Used some putty to fill in the holes, and one more sanding session. 
Dusted them off and painted them with two coats of antique white malemine paint (Same as our kitchen). Once the paint was dry we installed new hardware. Voila! Now commence nightstand love.
So there you have it folks, sometimes the thing you are searching for may not be as obvious as it seems. Sometimes you just need to take a step back and think outside the box.

When our 3 year old son saw me painting he got so excited and asked if he could help too. I didn't really want him using the melamine paint as it doesn't easily come out off clothes and skin. And I wanted to make sure the finish was as good as it could be... so I had him paint the back. No one sees the back anyway and he had a BLAST helping me paint. 


Saturday, 10 August 2013

homemade waffles anyone?


Who doesn't love a nice warm waffle? What mom doesn't love a quick healthy (homemade) breakfast?!  My son loves his waffles and I love that this recipe is so quick and easy. We can avoid buying those nasty-who-knows-what's-in-them frozen waffles and pre-mixed packages and go for something completely homemade. 

Having the dry ingredients all ready to go is a huge bonus with this recipe. Anything to make things quicker, and healthier home-cooked meals that much more accessible. This recipe makes about 6 small sized waffles (palm sized) and is easily doubled. Any extras do really well in the freezer. I like to cut parchment paper about 1/2 inch bigger than the waffle (on all sides) and I slip that between the waffles, put them in a large freezer bag and you're good to go. When you'd like a waffle simply pop them in the toaster. 

To make the waffle mix (dry ingredients):
1 cup flour
1.5 tsp sugar
1.5 tsp baking powder
1/2 tsp salt
(Store in an air-tight container)

To make the waffles, you will need:
2 eggs
3/4 cup milk
2 Tbsp oil

Make it healthier, I use:
 - whole wheat flour
 - organic coconut sugar 
 - organic farm fresh eggs 
 - coconut oil (or another healthy oil)

To make the waffles:
Beat the eggs until light and fluffy; the fluffier the better. You can use a hand whisk if you'd like but I like to use an electric hand mixer to whip more air into it. Add in 3/4 cup milk and 2 Tbsp oil (in the picture I had mixed both coconut oil and olive oil as my husband isn't a fan of the full 'coconut-ty' taste).


Mix in the dry ingredients until just combined. Let the mixture rest while you heat up the waffle iron. When the iron is hot, pour the waffle mixture onto the surface making sure to get into all the grooves. Cook according to the manufacture's instructions. 


Serve with syrup, fruit or even whipped topping as a treat. These are also great as dessert with some frozen yogurt and chocolate sauce. As I mentioned above, these can be frozen and popped in the toaster at a later date.

Note: I find that with my waffle iron I like to cook them and then flip them over and cook them again. But every one is different. The waffle iron that I have is made by Sunbeam. I've had it for years and it still works great. I have considered buying a big 'professional' one but I just don't have a need for it right now. This one works great and is small enough to be neatly tucked away in the cupboard when not in use.

I thought I'd also mention that having this quick recipe readily available makes it that much easier. Check out how I did it:
Gotta love a label maker :)

Monday, 5 August 2013

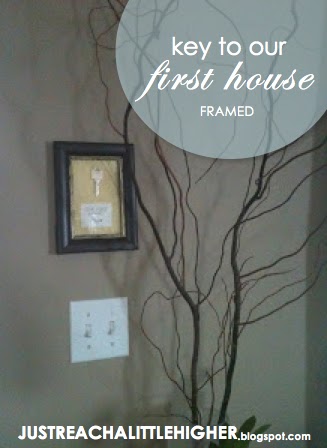
key to our first house


I am all for preserving memories and I believe that the closer you are to the actual memory the better. Feeling a bit of nostalgia I thought this was a great way to preserve the memory of walking in to our very first house. 

My husband and I got the keys to our now home on May 2nd, 2012. We were so excited to have our very own place to call home. Knowing that we both had the freedom and responsibility of our home (and family) was a bittersweet milestone. 


Want to preserve that memory of your first house? Follow the easy steps below - just make sure you change your locks before you use the key.

Step 1: locate key    (preferably not in use)
Step 2: find a frame - 4X6 works nicely    (I had an old one lying around with no picture in it)
Step 3: write a note    (I used, simply: 'our first house' and the year)
Step 4: use some craft paper as backing - something to match your decor
Step 5: line everything up and place inside the frame    (glue or tape work great to hold things in place)
Step 6: hang it up on the wall/mount on shelf, and admire!


PS - I took these pictures with my dinosaur iPhone 3GS, sorry for the quality.